
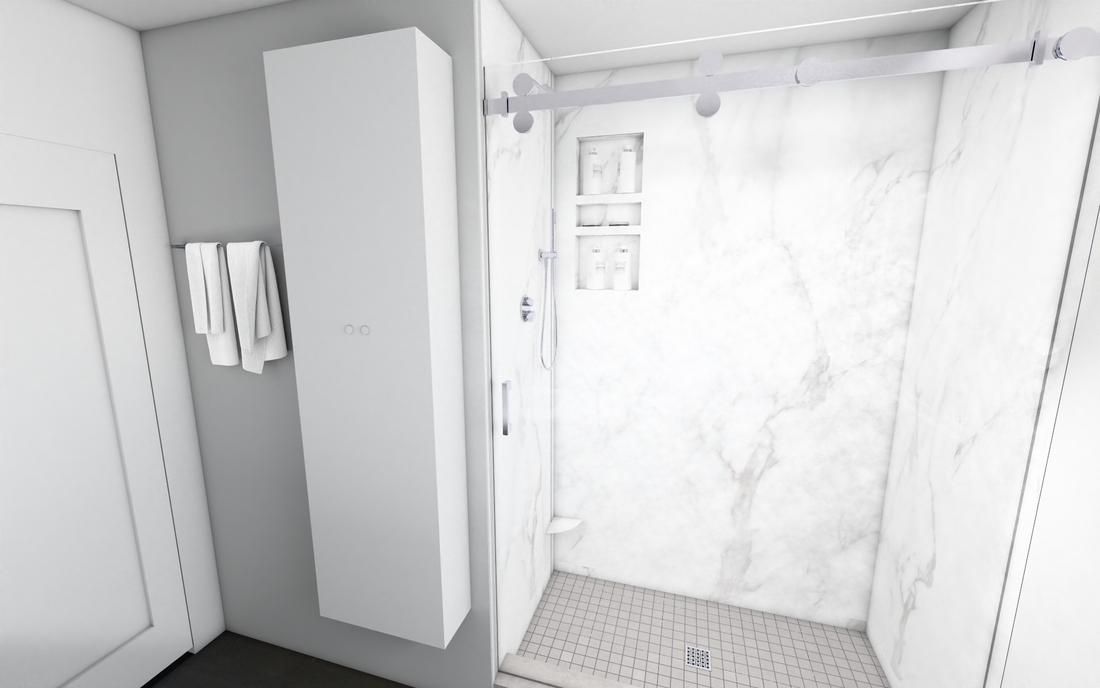
 Summer is almost here--one day away, in fact--so just in the nick of time for a spring shower render, as we bid adieu to an old bathroom in great need of an overhaul.
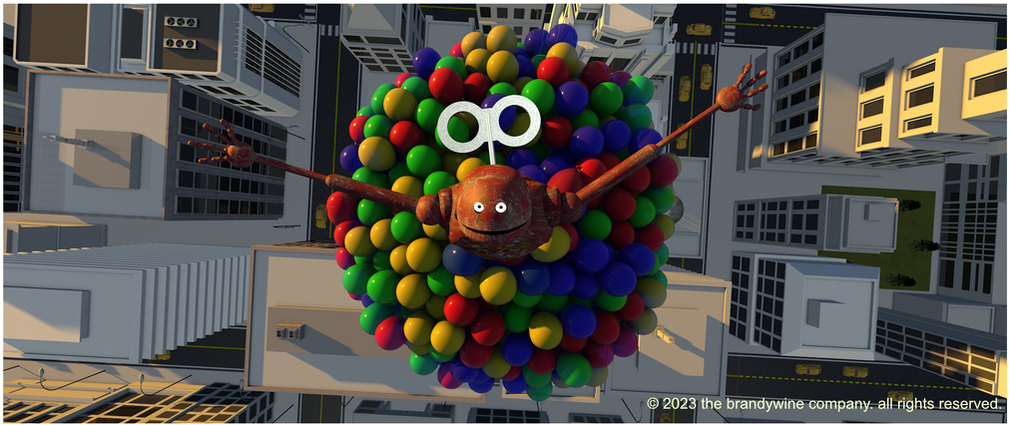
 The word "tentacles" always reminds me of the 1977 "Jaws" quickie that somehow managed to attract Henry Fonda, John Huston and Shelley Winters to its cast, not to mention a very talented octopus who is often shot in close-up. Director Ovidio Assonitis (credited as "Oliver Hellman") later worked with James Cameron on "Piranha II: The Spawning," but who directed what on that movie remains a mystery to this day, perhaps for good reason. On to making my own tentacles which, thanks to the magic of mograph, have more suckers than a bitcoin convention. 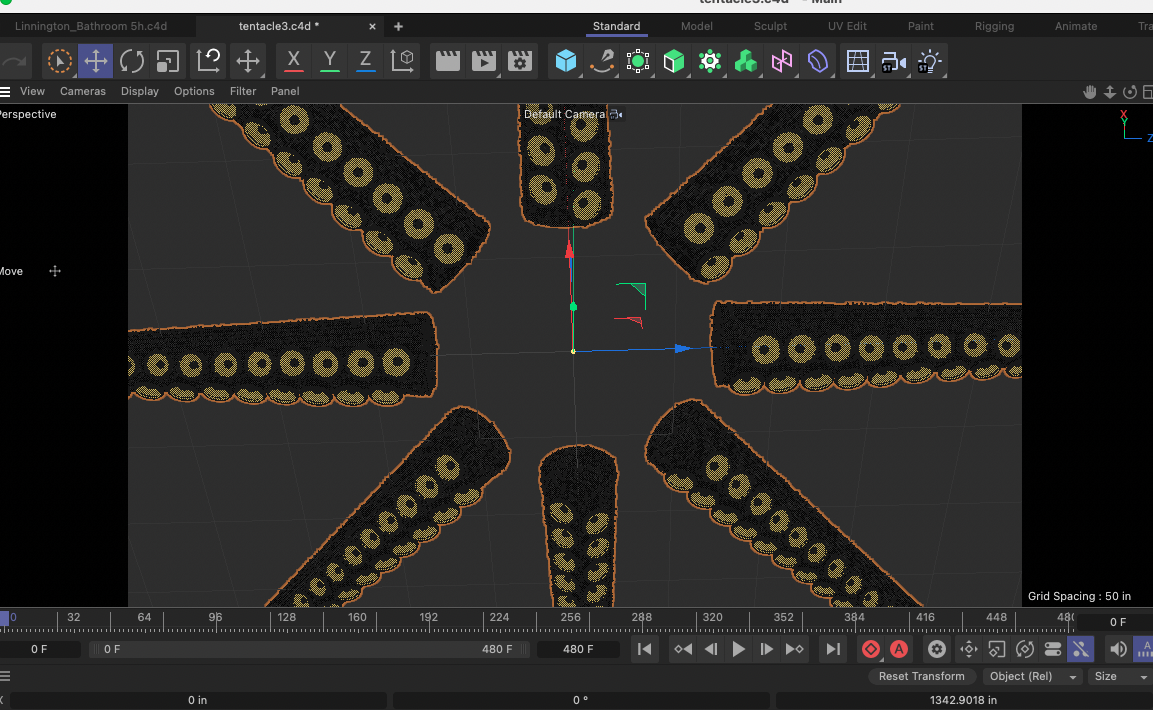 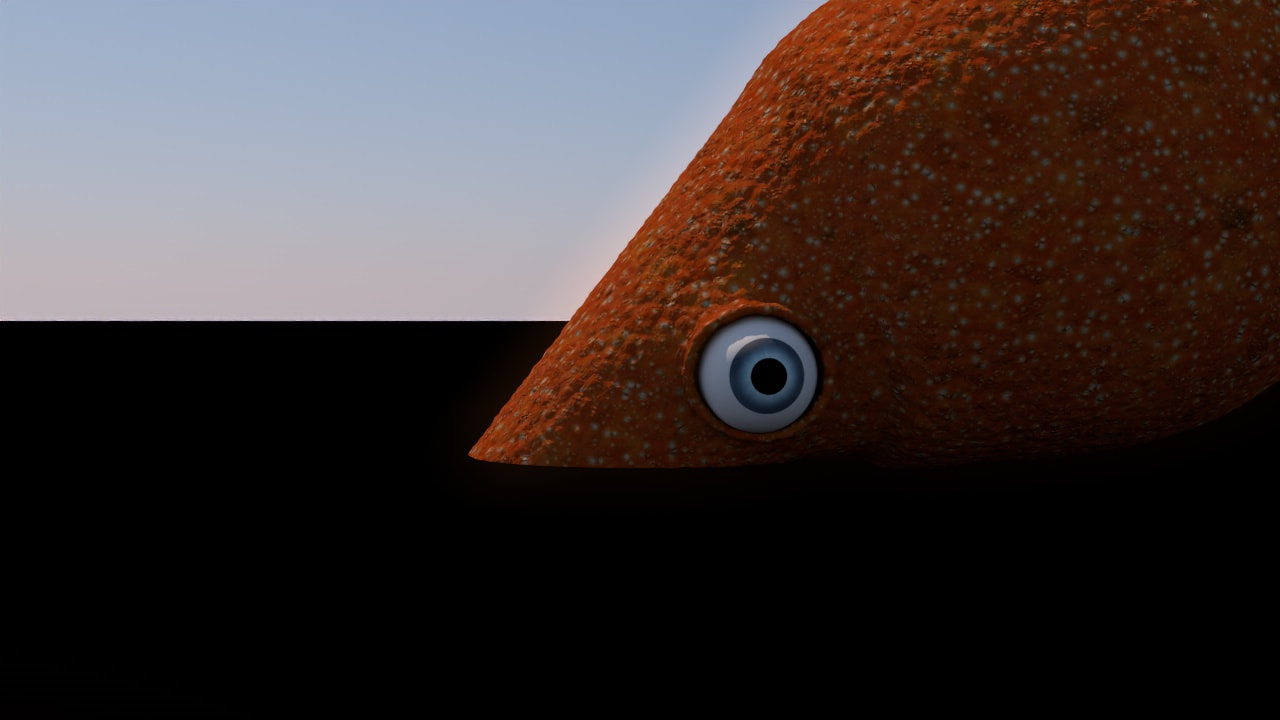 I added eyeballs to the sockets and rigged them to move in unison using a single controller. I also did a quick render of the head using a modified CGAxis texture to see how things are coming along.
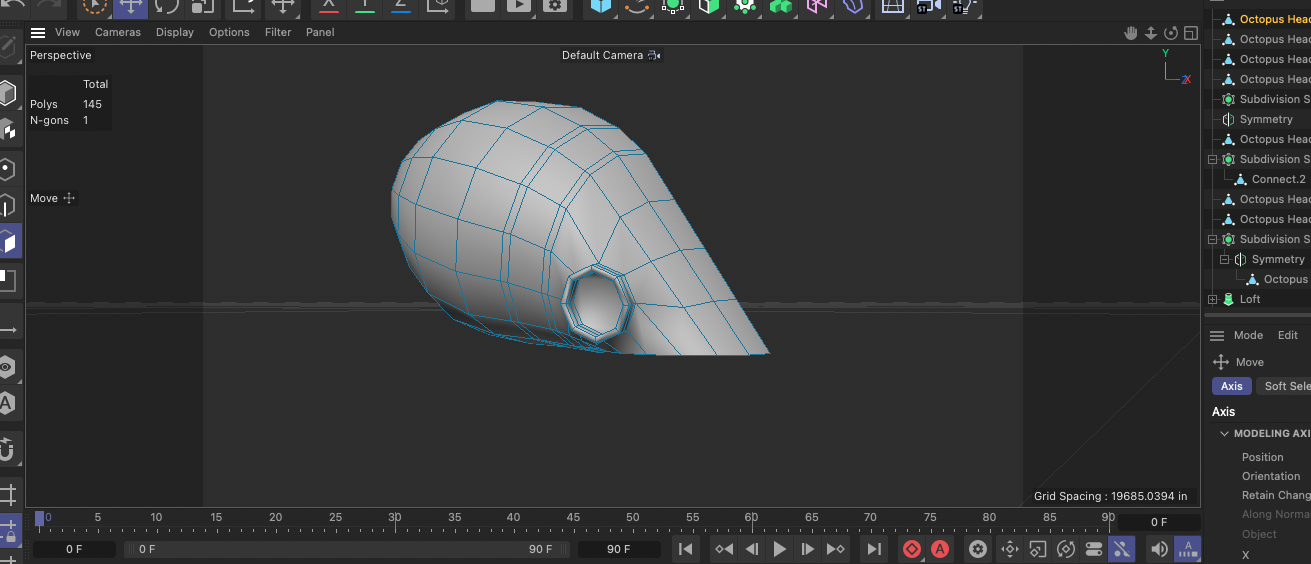 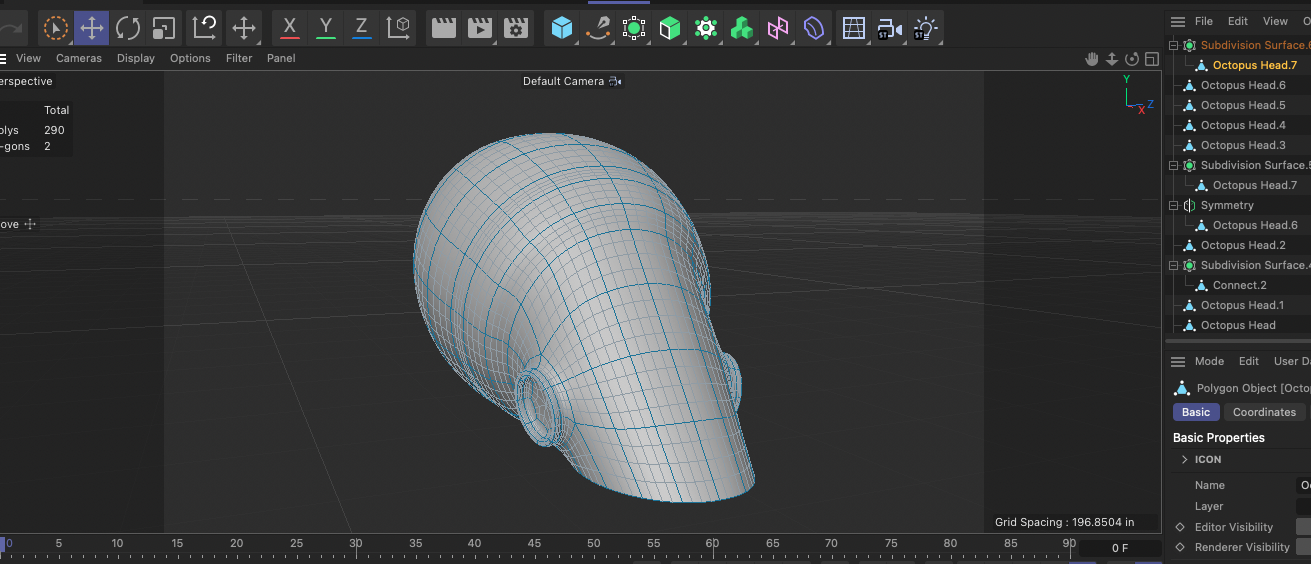 Using Cinema 4D R26's new Fit Circle and Flatten tools, which make polygonal modeling much easier, I added sockets for the eyeballs. The surfaces surrounding the sockets were built using the inset tool and the extrude tool. The other side of the head was made using symmetry, saving a lot of effort and ensuring, well, a symmetrical surface. The second screen grab shows the full mesh smoothed out with a subdivision surface.
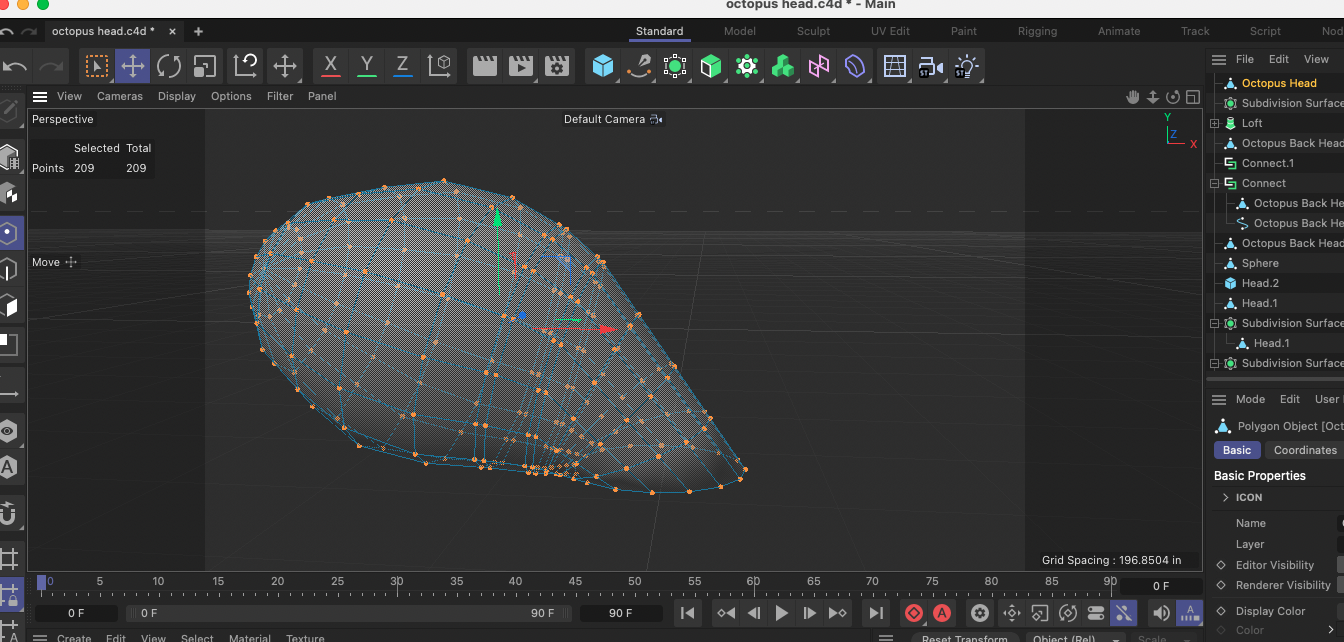 A new project, this one requiring the construction of an octopus model. I'm starting with the head. There are many ways to construct a polygon model and I often switch from one to another as I go along. I tried box modeling first, using a drawing of an octopus as a guide. But box modeling is too angular for such an organic shape, I think, so I switched to a sphere primitive to shape the back of the head, stretching it along the Y-axis using the scaling tool. I could have used the taper deformer as well, but scaling along the Y-axis made for a reasonably good start. I also used the symmetry object, meaning I cut the sphere primitive in half so I only had to worry about modeling half the model and let symmetry handle the other half. Much less stressful. Once the sphere primitive was stretched, I eliminated polygons at the 3/4 mark, selected the outside edge using the loop tool (U-L on the keyboard), converted the edge to a spline, then made a second identical spline and scaled it down, positioning it on the X-axis, in essence forming the neck (or the bottom of the face, depending on how one views octopus anatomy). Then I connected the two splines using the loft tool, used Connect Objects + Delete to form a single object, and connected (what will become) the face to the back of the head using the bridge tool. I'd like to add some eyes, so sculpting is next.
 Back in 2016, I created a post about the passing of Cactus Dan, a colorful programmer who, true to his name, lived in the middle of nowhere, rode horseback and created a series of plug-ins for Cinema 4D that were a godsend to character rigging. After his death, most assumed that his work was gone for good. But the awesome folks at Insydium, the maker of X-Particles, have made his plug-ins available once more, and for free no less. Check them out at https://insydium.ltd/community/cd-tools/
 A design for a cooking utensils and spices drawer that ended up being discarded when it was decided the stove and refrigerator were too close together. But hey, that's the beauty of designing in 3D; it's not a big deal to make changes.
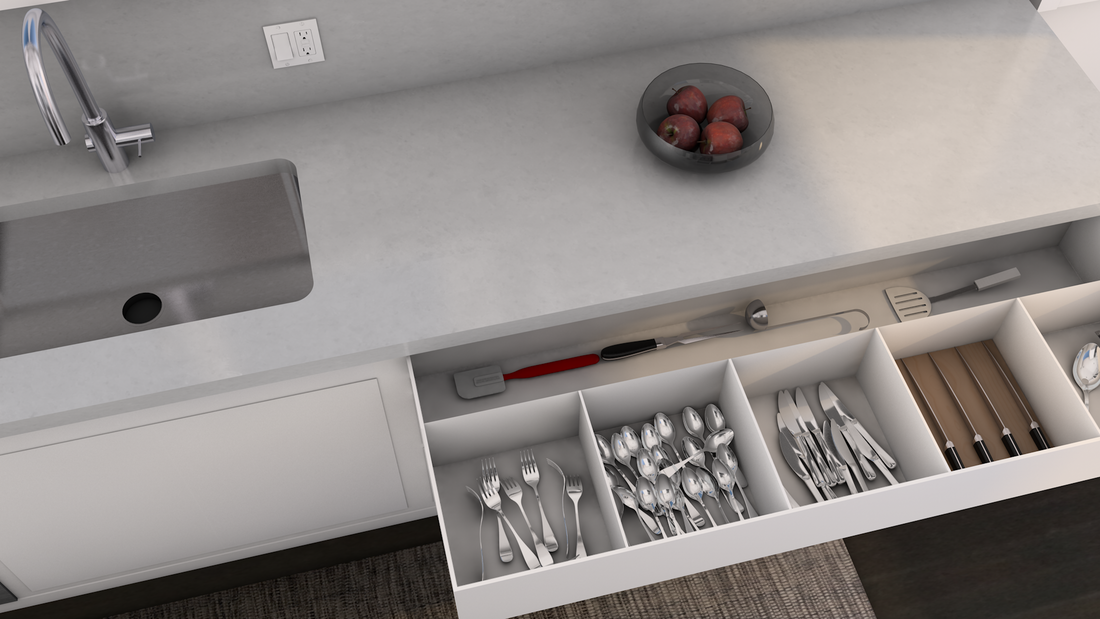 Yup, them there's some mighty big drawers. Companies like Bauformat use high pressure laminates and melamine in conjunction with Blum hinges to lessen cabinet door weight. This lets designers go all Pacific Rim with the size. I added apples and morning light to make the shot look less monochromatic. Why apples and not a big pizza and a bag of chips is anyone's guess.
 A wider angle of the kitchen remodel. As ideas change, the model changes to reflect those ideas. This render uses Cinema 4D's physical sky to add a little morning color. I used Cinema's built-in physical renderer, along with global illumination and ambient occlusion.
I also used the color mapping feature, which can be found under render settings, in the effects tab. Within color mapping's basic properties is HSV model. If you check this box, the HSV model's colors will be converted and only the brightness will be affected. This keeps colors from changing during the render. As the Help feature explains, a "dark blue will not be turned into a purple." |
Robert BorowskiMostly, he writes for a living. Archives
March 2023
|
 RSS Feed